How to Fix a Broken Sprinkler Pipe
Broken sprinklers can bring with them a whole set of problems like loss of pressure, water logging and unexpected water fountains, leading to water wastage. To troubleshoot the problem you will have to look for a plumber who may charge you a fortune, meanwhile your lawn will start growing brown. To avoid this you will have to take just a few steps. Actually fixing a broken sprinkler is not as difficult as you think, rather it can be fairly easy if you have the right technique and equipment. Let us learn about the method for fixing a broken sprinkler pipe.
Fixing a Broken Sprinkler Pipe
It is always better to list down the requirements beforehand as it becomes very irritating to visit a hardware store in the middle of a task. So, take a look at the requirements given below for fixing the broken sprinkler.
You will Need:
Pipe
Hacksaw or pipe cutter
Shovel
2 straight connectors
Pen or a pencil
Rags
PVC glue
Primer (for PVC) and a threader (for metal)
Steps:
Step # 1
The first thing you need to do is look for the leakage. It will be generally at the point where there is unexpected water sprouting out or a mucky grass area. Once you find the leakage it is easy to treat it, but if you take hours to locate the leakage it will be a tiring as well as frustrating job. So be attentive while you are identifying the leakage.
Step # 2
Once the leakage spot is found turn off the water supply. You can stop the water supply of your house if you have a separate connection, or you can contact the local water department and request them to turn down the supply. If you don't stop the water supply, the task will become extremely difficult.
Step # 3
Dig the ground with the shovel till the broken pipe is visible perhaps you can dig more to create enough room around the pipe to work. Make sure that you clear the area thoroughly by removing the water clogged near the pipe as well the mud and dirt.
Step # 4
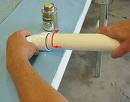
Now, it is time to cut the broken pipe. Take a hacksaw or a pipe cutter and cut approximately 2 to 3 inches on both the sides of the pipe. If you are not confident enough about the measurements, take the two connectors, one with the female end and the other with the male end and hold them over the broken pipe. Mark the points on both the sides where you are supposed to cut the pipe.
Step # 5
Slide the male and female connectors into the new pipe and keep it aside. Take a rag and clean the ends of the pipe and remove the dirt properly. Also clean the ends of the connectors and apply primer (in case of PVC pipe) and a threader (in case of metal pipe) to the connectors as well as to the pipe ends. Let the primer dry.
Step # 6
Once the primer dries, apply PVC glue inside the connectors and on the outer surface of the pipe and attach them. Be quick in doing this because the glue might dry in air.
Step # 7
Leave the connection as it is for at least an hour or so. Wait until is dries completely because if you turn on the water supply before drying water pressure might disturb the connection come apart and your efforts will go in vain.
Step # 8
Now, it is the last step to check the success of the task by testing the working of new connection. Turn on the water supply and check for any leakage. If you don't find any, it is clear that you have followed the correct technique.
Fixing a broken pipe is a part of your sprinkler system repair. To avoid frequent pipe leakage and its breaking, keep monitoring your pipeline on a regular basis. If the problem in the system is not because of the broken pipe, you will need a thorough inspection of the system to find the cause of the problem.
By Snehal Motkar
Visit to - http://pvcpipefitting.blogspot.com/
Source - buzzle.com/articles/how-to-fix-a-broken-sprinkler-pipe.html
Tags : fix broken sprinkler head
how to fix broken sprinkler pipe video
how to fix broken sprinkler line
sprinkler pipe burst
sprinkler pipe repair
Tuesday, May 8, 2012

Tuesday, June 21, 2011
New York Plumber | NYC Plumbing | Plumbing New York | Plumber New
 New York Plumber | NYC Plumbing | Plumbing New York | Plumber New
Gateway Plumbing & Heating
Since 1976, Gateway Plumbing and Heating has built a reputation as New York City and suburban New Jersey's go-to plumbing and heating company.http://www.fittings-pipe.com/
Homeowners, contractors, architects, designers, and engineers alike rely on us for the most dependable service, the highest value, and the utmost professionalism and skill in our trade.
We specialize in:
-General residential and business services
-Commercial construction and mechanical work
-High-end renovation work, according to your architect's plans or our own design
-Troubleshooting
-Hot/cold water cross connections
-Recurring heating problems
-Removing violations
Working in both New York City and suburban New Jersey for over 30 years has given us valuable experience installing and maintaining various fixtures and mechanical systems that most other firms have not the opportunity to encounter.
Whether you are looking for expansive, custom, or boutique installations and services, or simply routine heating and plumbing repairs at home, you can be assured that Gateway's trained technicians will provide you with the best service available, anywhere. We guarantee all of our work and use only the highest quality materials. That means brand-name repair parts, pipes, and fittings, and other materials that often exceed the quality required by code. Our mission is simply to perform at our best, for all of our customers, every day.
For examples of our work, please visit our photo gallery or download our portfolio.
Jay Ell Plumbing
For an excellent plumber in New York, NY and the surrounding areas, call Jay EllPlumbing. With 45 years experience in the plumbing industry, we offer ...
www.elocalprofiles.com/PlumberinNewYork50845.html307 7th Avenue, New York - (212) 989-6670
"For over 30 years, our goal has been to ensure the complete satisfaction of..."- servicemagic.com (4)
insiderpages.com (12)26 reviews
Place pageWATERHOUSE PLUMBING COMPANY
Best Plumbing Tile & WaterHouse New York NY- - Plumbing For Bath. 24/7 Open. Till Late With The Best.
www.ewaterhouse.com/56 Franklin Street, New York (212) 226-7758
yelp.com (1)1 review
Place pageDemar Plumbing Corporation
Demar Plumbing NYC. Home; Our Services; New York City Backflow Prevention; Online Payments; Contact Us. (212) 614-9717
www.demarplumbingnyc.com/147 Attorney Street, New York (212) 614-9717
Saturday, May 21, 2011
How to Fix a PVC Pipe With Water Gushing Out
How to Fix a PVC Pipe With Water Gushing Out
Down here in Florida, and I guess this would be true for other places in the south, where it never gets cold enough, long enough to freeze water pipes, a very unusual practice takes place. At least it's unusual to me, because I grew up in Michigan, where all pipes that have any kind of water in them must be buried under the frost line, and that is 4'6" where I'm from, deeper if you go further north. Visit to -www.fittings-pipe.com
Read more: http://gomestic.com/do-it-yourself/how-to-fix-a-broken-pvc-pipe-with-water-gushing-out/#ixzz1MyeS7ldP
The unusual practice that I speak of is, having the feed for lawn sprinkler systems exposed above the ground. Let me explain, the feed for this is usually a 1" PVC pipe that rises about 2' above the ground with a 90 degree elbow, then a short piece of PVC with a threaded coupling, this threaded coupling goes into a 1" brass ball valve, next there are back to back 1" cast iron backflow preventer's with strainers, then back into a 1" brass ball valve another short piece of PVC a 90 degree elbow and finally back in to the ground where it will usually go to the garage to a water management timer and from there it feeds the sprinkler system.
Now think about this for a moment. We have these two 1" PVC pipes sticking up from the ground holding up about 30 pounds of cast iron and brass components. I don't know who the genius is that thought of this, but it seems to be the standard for these systems here. The first house I lived in when I moved down here, this set up was right in the middle of the backyard. Pretty easy to spot when mowing the lawn, but it looked pretty ugly as well. The next house I moved to, it was tucked away in the back corner of the yard, out of the way behind the shed.
In the spring time down here we get a lot of rain and vegetation grows very fast, my weed wacker was broke and it had been a week or so since I had trimmed the yard. So I'm out there cutting the lawn on my riding lawn mower, which I had just bought a couple of months ago, because it is too damn hot and humid to be trying to push mow anything down here, and I was making my first pass around the backyard. as I passed behind the shed I knew that the sprinkler pipe was in this area but couldn't see it because the vegetation had grown up and hid it from my sight. I thought that I had given plenty of room and went right by. I don't think I moved ten feet when I could feel water landing on my back. I knew immediately what I had done. I pulled the tractor up another twenty feet, so it wouldn't get soaked and shut it off.
When I turned around I almost couldn't believe my eyes, water was shooting up into the air 15-20 feet. The first thing I thought of was to shut one of the ball valves, which was a great idea except for the fact that the pipe was broke before the valves and they were lying on the ground. At first the water felt kinda cold but after a couple minutes I was getting pretty used to it. I was really amazed at the water pressure coming out of that pipe. Being a pipe fitter I looked in my stuff to see if I had anything to cap this geyser off with, but I work on steel pipe and couldn't find anything. so I ran up to the hardware store and purchased a 1' PVC cap and some PVC primer and glue.
So the first thing that I wanted to do was to square off the end of the pipe that had been broken. I got out my 1/2" x 1-1/2" pipe cutter and cut it off about a foot above the ground. I then filed the end of the pipe so the cap would slip on to it nice and easy. Now keep in mind that the whole time that I'm doing this I am getting a steady stream of water dumped on my head, because it's shooting straight up in the air and coming right down on me. Not only that, there is now about 4 inches of water built up on the ground.
Alright, my pipe is cut an cleaned, so I put the primer on the pipe and then in the cap an then the glue on both. I then force the cap down onto the pipe and hold it with my hand in my crotch and applying all my weight on it. The water stops squirting out and I hold this position for about a minute, till my hand just couldn't take it anymore. I slowly start to take my weight off of the cap and then move away, thinking whew, glad thats over. I took maybe two steps backward and poof, the cap pops off and flies about 30 feet into the air and water is gushing everywhere again. Just about this time my wife comes out and says "maybe we should call a plumber". HAHA very funny.
After I found the cap, I saw that it had only gone onto the pipe about a quarter inch. Maybe the water was messing with the glue. so I cleaned everything back up and had her hold the other pipe, the one that had broken with the 90 on it, so it would shoot the water away from me and the pipe so the glue wouldn't get wet. At least I'm not the only one getting wet now. I reprimered and glued the pipe and cap. Once again I tried to force that cap back onto the pipe, but the pressure was just too strong and I just couldn't get it to stay. I again heard that little voice "maybe you should call a plumber". I am not paying someone $90 an hour to fix this when I know I can do it myself. Just then, it hits me, and I think to myself you idiot, you sure wouldn't fix this, like this at work.
So I head back up to the hardware store make my purchase and hurry home. By this time there is probably 6 inches of water on the ground and my wife says do you need my help? Nope I got it. I clean the pipe off one last time and apply the primer and glue to the pipe and the PVC ball valve I had just purchased from the hardware store. with the valve in the open position I slip it onto the pipe and make a quarter turn and hold it in place for about a minute. When I'm sure the glue has set I simply closed the valve and my nightmare was over. I purchased a ten foot piece of PVC pipe, three 90s, one straight slip coupling and a couple threaded couplings. It only took about a half an hour to completely rebuild the whole thing, and needless to say I don't let the weeds grow up that high back there anymore.
I hope that this story has helped you. I know that I could have just told you from the beginning what to do, but I think you'll remember it better this way. Visit to -www.fittings-pipe.com
Down here in Florida, and I guess this would be true for other places in the south, where it never gets cold enough, long enough to freeze water pipes, a very unusual practice takes place. At least it's unusual to me, because I grew up in Michigan, where all pipes that have any kind of water in them must be buried under the frost line, and that is 4'6" where I'm from, deeper if you go further north. Visit to -www.fittings-pipe.com
Down here in Florida, and I guess this would be true for other places in the south, where it never gets cold enough, long enough to freeze water pipes, a very unusual practice takes place. At least it’s unusual to me, because I grew up in Michigan, where all pipes that have any kind of water in them must be buried under the frost line, and that is 4′6″ where I’m from, deeper if you go further north.
The unusual practice that I speak of is, having the feed for lawn sprinkler systems exposed above the ground. Let me explain, the feed for this is usually a 1″ PVC pipe that rises about 2′ above the ground with a 90 degree elbow, then a short piece of PVC with a threaded coupling, this threaded coupling goes into a 1″ brass ball valve, next there are back to back 1″ cast iron backflow preventer’s with strainers, then back into a 1″ brass ball valve another short piece of PVC a 90 degree elbow and finally back in to the ground where it will usually go to the garage to a water management timer and from there it feeds the sprinkler system
Read more: http://gomestic.com/do-it-yourself/how-to-fix-a-broken-pvc-pipe-with-water-gushing-out/#ixzz1MyeS7ldP
The unusual practice that I speak of is, having the feed for lawn sprinkler systems exposed above the ground. Let me explain, the feed for this is usually a 1" PVC pipe that rises about 2' above the ground with a 90 degree elbow, then a short piece of PVC with a threaded coupling, this threaded coupling goes into a 1" brass ball valve, next there are back to back 1" cast iron backflow preventer's with strainers, then back into a 1" brass ball valve another short piece of PVC a 90 degree elbow and finally back in to the ground where it will usually go to the garage to a water management timer and from there it feeds the sprinkler system.
Now think about this for a moment. We have these two 1" PVC pipes sticking up from the ground holding up about 30 pounds of cast iron and brass components. I don't know who the genius is that thought of this, but it seems to be the standard for these systems here. The first house I lived in when I moved down here, this set up was right in the middle of the backyard. Pretty easy to spot when mowing the lawn, but it looked pretty ugly as well. The next house I moved to, it was tucked away in the back corner of the yard, out of the way behind the shed.
In the spring time down here we get a lot of rain and vegetation grows very fast, my weed wacker was broke and it had been a week or so since I had trimmed the yard. So I'm out there cutting the lawn on my riding lawn mower, which I had just bought a couple of months ago, because it is too damn hot and humid to be trying to push mow anything down here, and I was making my first pass around the backyard. as I passed behind the shed I knew that the sprinkler pipe was in this area but couldn't see it because the vegetation had grown up and hid it from my sight. I thought that I had given plenty of room and went right by. I don't think I moved ten feet when I could feel water landing on my back. I knew immediately what I had done. I pulled the tractor up another twenty feet, so it wouldn't get soaked and shut it off.
When I turned around I almost couldn't believe my eyes, water was shooting up into the air 15-20 feet. The first thing I thought of was to shut one of the ball valves, which was a great idea except for the fact that the pipe was broke before the valves and they were lying on the ground. At first the water felt kinda cold but after a couple minutes I was getting pretty used to it. I was really amazed at the water pressure coming out of that pipe. Being a pipe fitter I looked in my stuff to see if I had anything to cap this geyser off with, but I work on steel pipe and couldn't find anything. so I ran up to the hardware store and purchased a 1' PVC cap and some PVC primer and glue.
So the first thing that I wanted to do was to square off the end of the pipe that had been broken. I got out my 1/2" x 1-1/2" pipe cutter and cut it off about a foot above the ground. I then filed the end of the pipe so the cap would slip on to it nice and easy. Now keep in mind that the whole time that I'm doing this I am getting a steady stream of water dumped on my head, because it's shooting straight up in the air and coming right down on me. Not only that, there is now about 4 inches of water built up on the ground.
Alright, my pipe is cut an cleaned, so I put the primer on the pipe and then in the cap an then the glue on both. I then force the cap down onto the pipe and hold it with my hand in my crotch and applying all my weight on it. The water stops squirting out and I hold this position for about a minute, till my hand just couldn't take it anymore. I slowly start to take my weight off of the cap and then move away, thinking whew, glad thats over. I took maybe two steps backward and poof, the cap pops off and flies about 30 feet into the air and water is gushing everywhere again. Just about this time my wife comes out and says "maybe we should call a plumber". HAHA very funny.
After I found the cap, I saw that it had only gone onto the pipe about a quarter inch. Maybe the water was messing with the glue. so I cleaned everything back up and had her hold the other pipe, the one that had broken with the 90 on it, so it would shoot the water away from me and the pipe so the glue wouldn't get wet. At least I'm not the only one getting wet now. I reprimered and glued the pipe and cap. Once again I tried to force that cap back onto the pipe, but the pressure was just too strong and I just couldn't get it to stay. I again heard that little voice "maybe you should call a plumber". I am not paying someone $90 an hour to fix this when I know I can do it myself. Just then, it hits me, and I think to myself you idiot, you sure wouldn't fix this, like this at work.
So I head back up to the hardware store make my purchase and hurry home. By this time there is probably 6 inches of water on the ground and my wife says do you need my help? Nope I got it. I clean the pipe off one last time and apply the primer and glue to the pipe and the PVC ball valve I had just purchased from the hardware store. with the valve in the open position I slip it onto the pipe and make a quarter turn and hold it in place for about a minute. When I'm sure the glue has set I simply closed the valve and my nightmare was over. I purchased a ten foot piece of PVC pipe, three 90s, one straight slip coupling and a couple threaded couplings. It only took about a half an hour to completely rebuild the whole thing, and needless to say I don't let the weeds grow up that high back there anymore.
I hope that this story has helped you. I know that I could have just told you from the beginning what to do, but I think you'll remember it better this way. Visit to -www.fittings-pipe.com
Saturday, February 26, 2011
Make a PVC Water Distribution System From Your Rain Barrel
Make a PVC Water Distribution System From Your Rain Barrel to Your Garden in 3 Easy Steps
Placing a Rain Barrel underneath a downspout is the method most people will use to collect and store the water coming from the rooftop, but how do you get the water to your garden? Certainly, a garden hose can be connected to your rain bucket and used to distribute water to your vegetables. However, a garden hose can be a hassle as it can constantly tangle and get caught up in other brush and yard obstacles. When you are done with the hose it needs to be wrapped up and put away after each use.
A PVC water distribution system can be an easy alternative to the garden hose method in getting water to your new garden. Channeling the water through PVC is a much more permanent solution and provides a fixed and stationary way for getting water where you need it the most. Since PVC can sit above or below ground, you can decide the best approach based on your preferences.
Step 1 Plan your Route - Planning your PVC water route is not as overwhelming as it may seem. All that needs to be done in this is to establish the best, most efficient route from point A, your rain barrel to Point B your vegetable garden. As your old Math Teacher used to say "The shortest path between two points is a straight line." Try to define the straightest line between points A and B if possible. This will minimize the amount of elbows and tees needed to put your PVC water system together.
Step 2 -Once you have defined the best path, map out and measure the route you want your PVC delivery system to take. Purchase the materials at your local garden or home improvement store. Be mindful to purchase a few extra tees and elbows as sometimes your tubing may need to be re-routed a different way due to some of the obstacles in your yard.
Step 3 - Begin to erect your delivery system by placing the PVC tubing, tees and elbows together. Once it is all in place use, hook up a garden hose to the beginning to test it out. Since the pressure from your rain barrel will not be high, it is recommended to keep the hose pressure fairly low. If you have reached the desired result, go back through and glue each piece together with PVC cement. Connect the beginning to your rain barrel spigot and test the system from beginning to end.
In summary, a PVC water delivery system can be a fairly simple task to design and put together. Once in place, your rain barrel will become the main water source and feed your garden with the liquid refreshment it will need on hot dry evenings.
Placing a Rain Barrel underneath a downspout is the method most people will use to collect and store the water coming from the rooftop, but how do you get the water to your garden? Certainly, a garden hose can be connected to your rain bucket and used to distribute water to your vegetables. However, a garden hose can be a hassle as it can constantly tangle and get caught up in other brush and yard obstacles. When you are done with the hose it needs to be wrapped up and put away after each use.
A PVC water distribution system can be an easy alternative to the garden hose method in getting water to your new garden. Channeling the water through PVC is a much more permanent solution and provides a fixed and stationary way for getting water where you need it the most. Since PVC can sit above or below ground, you can decide the best approach based on your preferences.
Step 1 Plan your Route - Planning your PVC water route is not as overwhelming as it may seem. All that needs to be done in this is to establish the best, most efficient route from point A, your rain barrel to Point B your vegetable garden. As your old Math Teacher used to say "The shortest path between two points is a straight line." Try to define the straightest line between points A and B if possible. This will minimize the amount of elbows and tees needed to put your PVC water system together.
Step 2 -Once you have defined the best path, map out and measure the route you want your PVC delivery system to take. Purchase the materials at your local garden or home improvement store. Be mindful to purchase a few extra tees and elbows as sometimes your tubing may need to be re-routed a different way due to some of the obstacles in your yard.
Step 3 - Begin to erect your delivery system by placing the PVC tubing, tees and elbows together. Once it is all in place use, hook up a garden hose to the beginning to test it out. Since the pressure from your rain barrel will not be high, it is recommended to keep the hose pressure fairly low. If you have reached the desired result, go back through and glue each piece together with PVC cement. Connect the beginning to your rain barrel spigot and test the system from beginning to end.
In summary, a PVC water delivery system can be a fairly simple task to design and put together. Once in place, your rain barrel will become the main water source and feed your garden with the liquid refreshment it will need on hot dry evenings.
Subscribe to:
Posts (Atom)